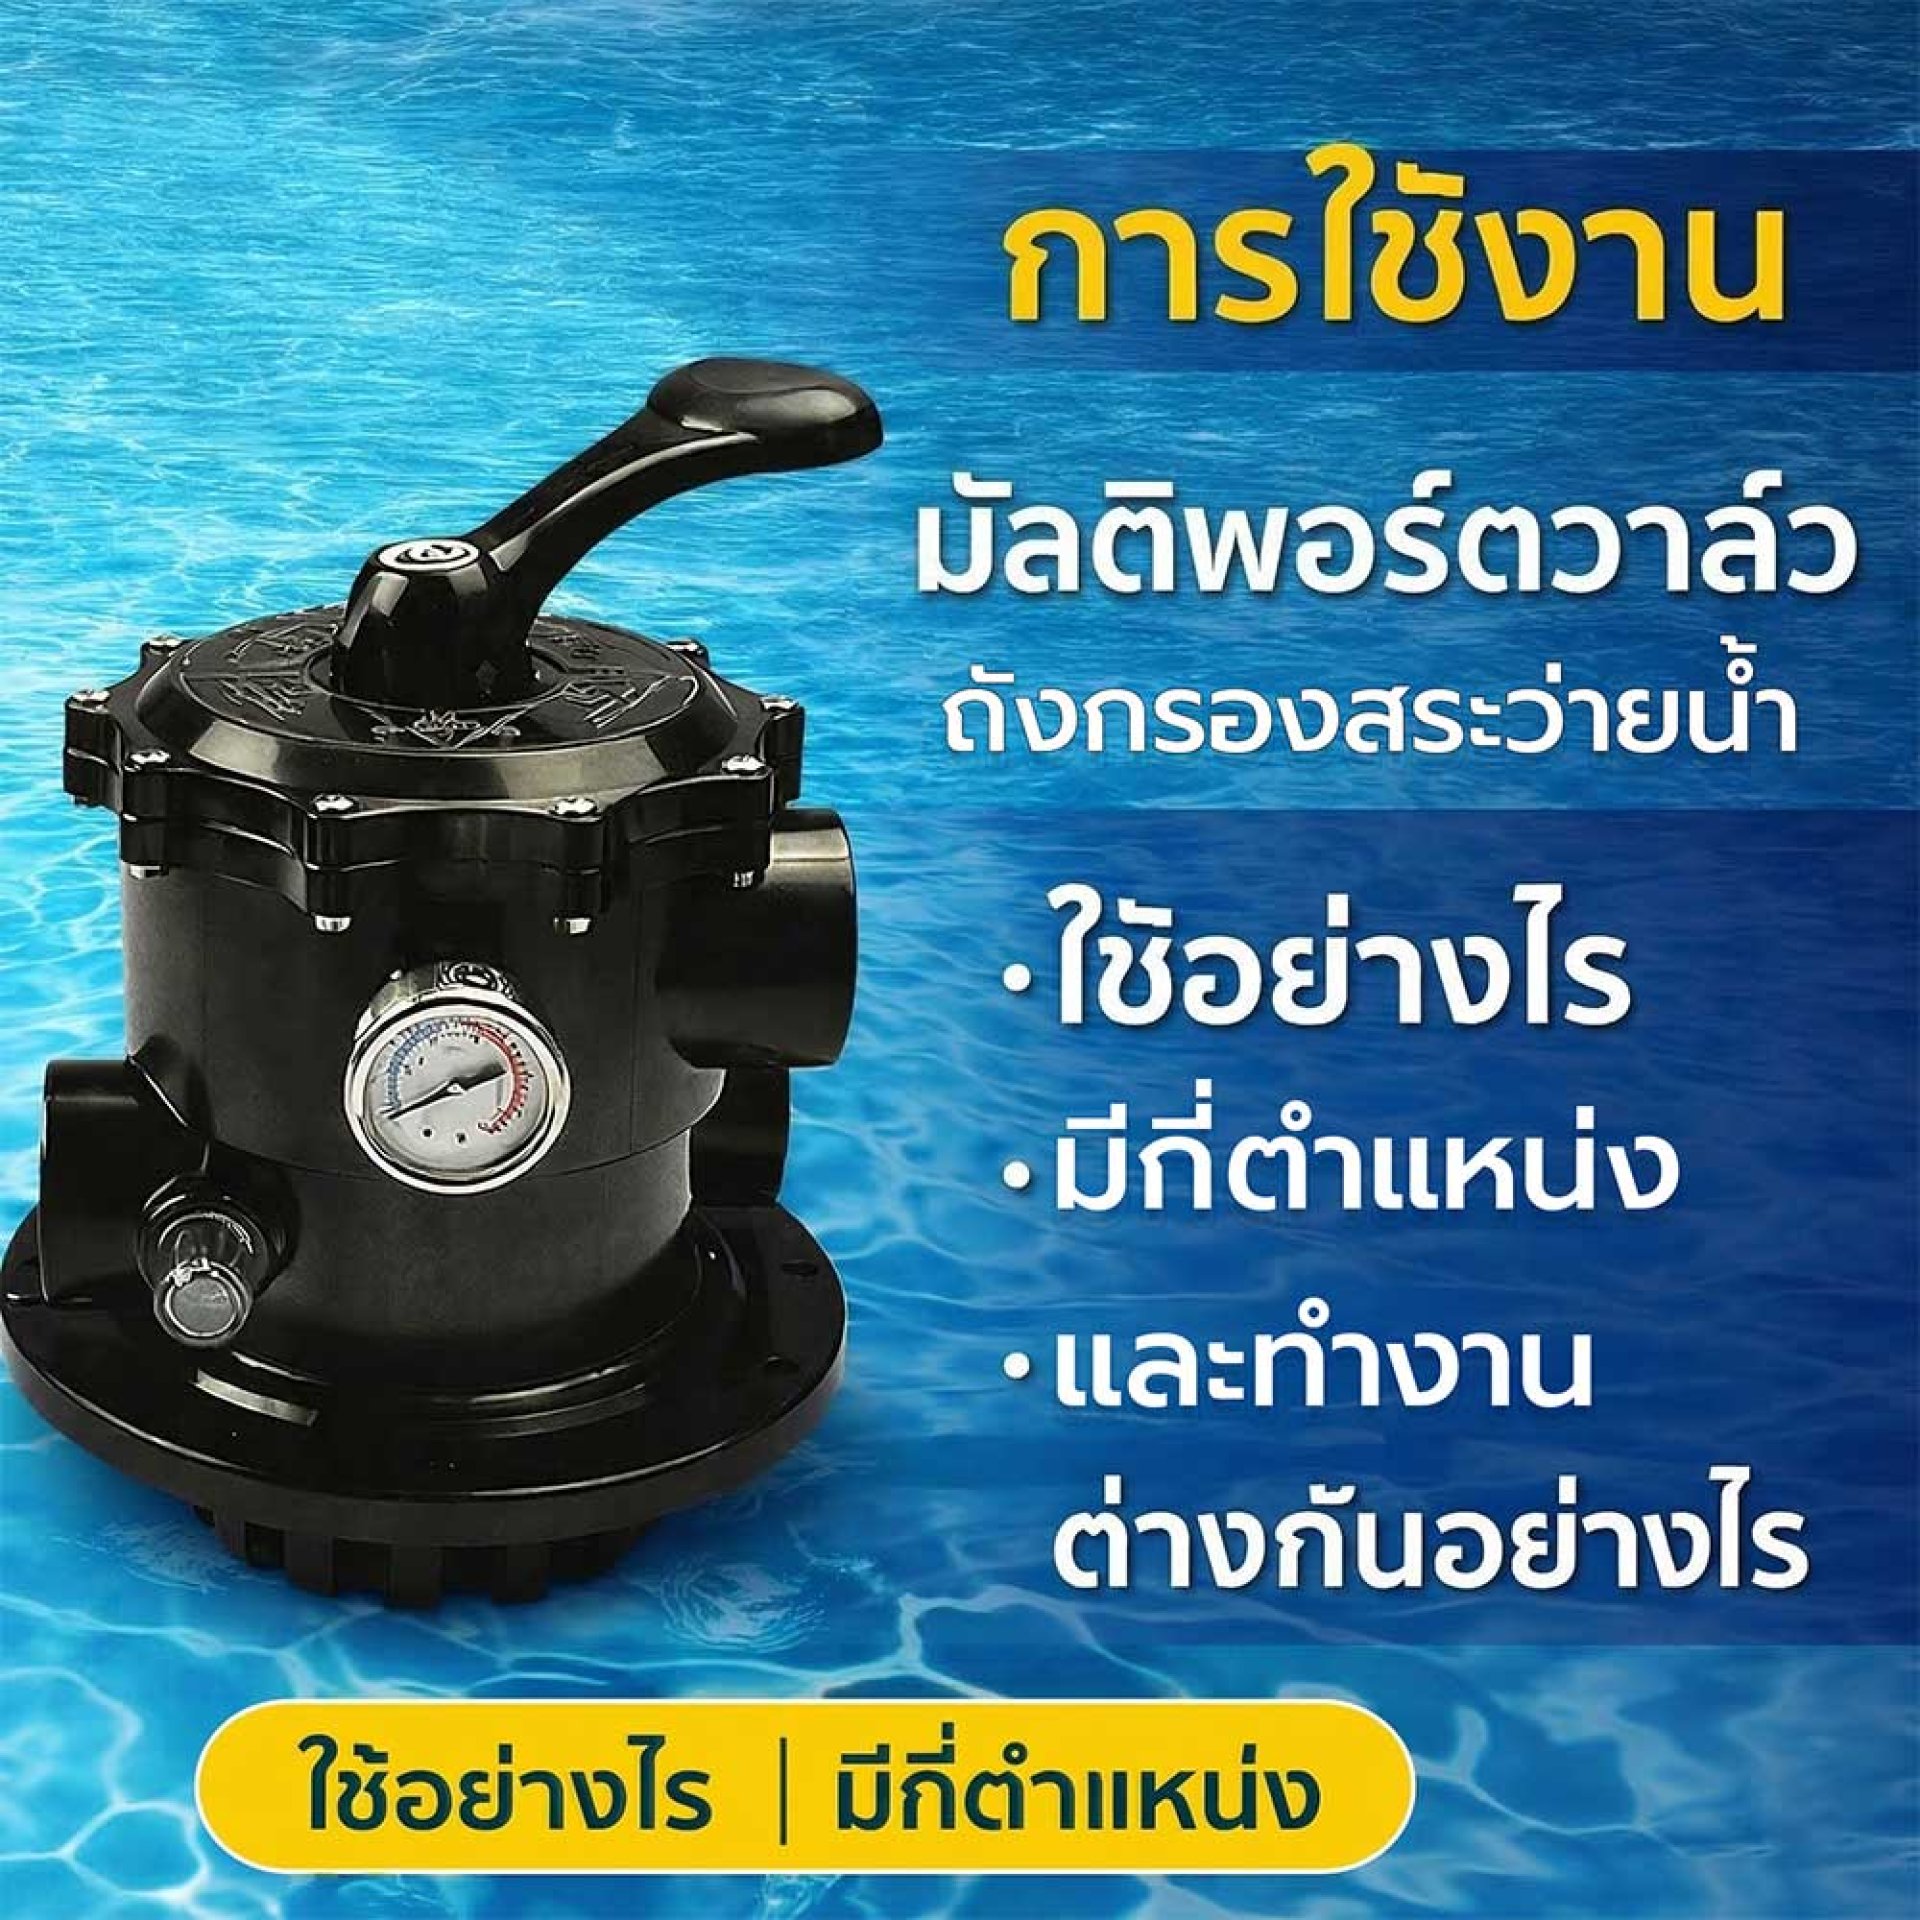
How to use a multi-port valve - How many positions does it have and how do they work differently?
Filter Operation & Maintenance
By Winwin Pool
This article is the intellectual property of Winwin Pool. Any reproduction or distribution of the content or images must receive prior permission from Winwin Pool.
Written by Preecha Sripradu
Engineer & Owner of Winwin Pool
Multiport Valve is an important component in swimming pool filtration systems. There are two main types:
- Top Mount installed on top of the filter tank
- Side Mount installed on the side of the filter tank
Most multiport valves come with 6 different positions. In this article, we will explain how each position works using the Top Mount Multiport Valve as an example.
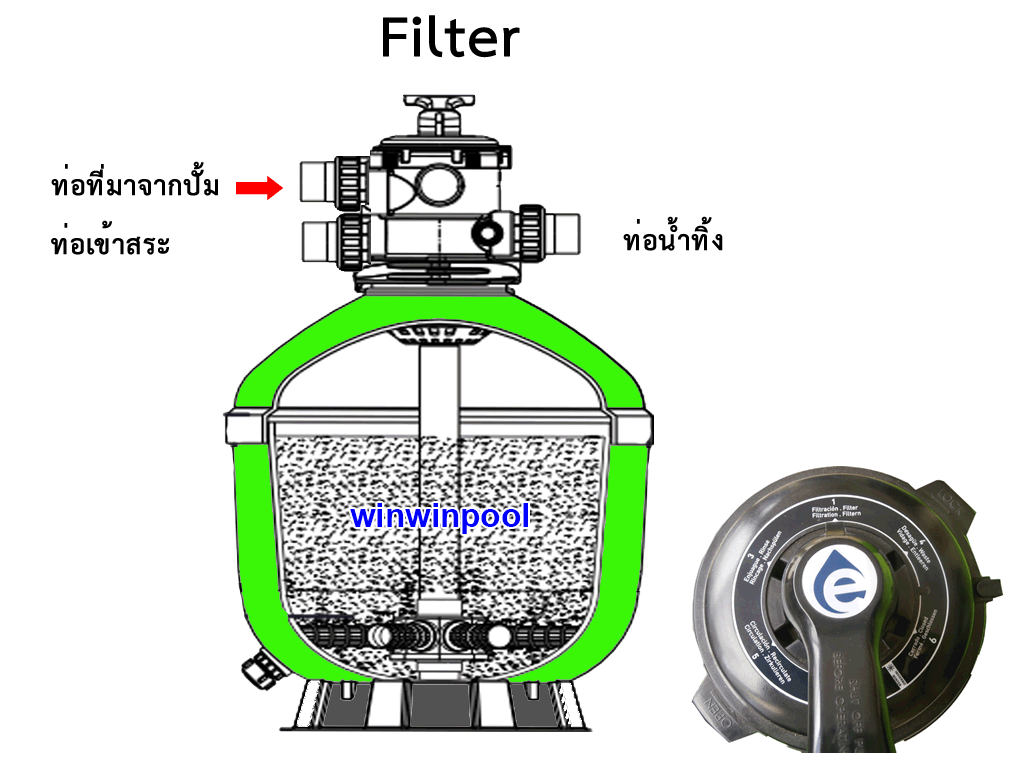
1. Filter Mode
This is the primary operating position of the filtration system and is used about 90% of the time.
Water flows from the pump into the valve through the pipe labeled PUMP. The water then flows downward through the sand filter bed. Dirt and debris larger than the sand particles are trapped at the surface of the sand.
Clean water passes through the lower filter laterals (strainer arms) located at the bottom of the tank. These laterals have very small slots that allow water to pass but prevent sand from escaping. If sand is seen returning to the pool, it usually means the laterals are damaged.
The filtered water then travels up through the center pipe and exits through the RETURN line, where it may pass through additional systems such as a salt chlorinator or other treatment systems before returning to the swimming pool.
2. Backwash Mode
During normal filtration, dirt and debris gradually accumulate inside the filter tank. Over time, the sand bed becomes compacted and less effective.
The Backwash function reverses the water flow direction to clean the sand filter. Water flows from the pump down the center pipe and then upward through the sand bed.
This reverse flow lifts and agitates the sand, allowing trapped dirt and debris to be flushed out through the Waste / Drain line.
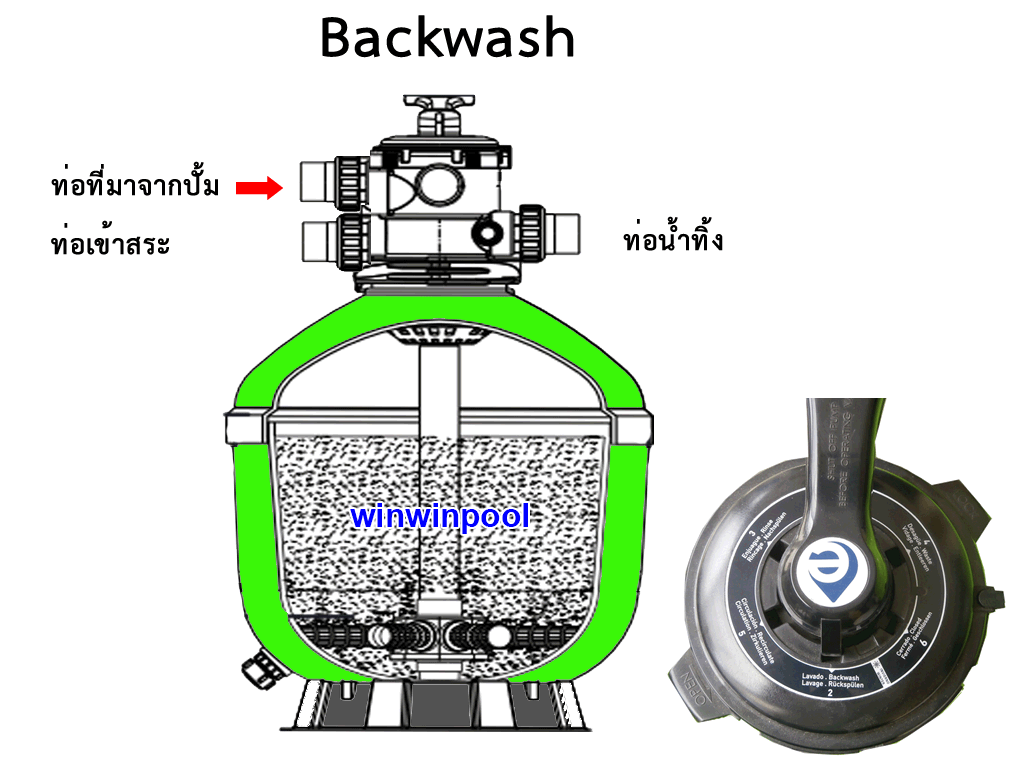
Most systems include a Sight Glass that allows you to observe the water being discharged. When the water appears clear, the backwashing process is complete.
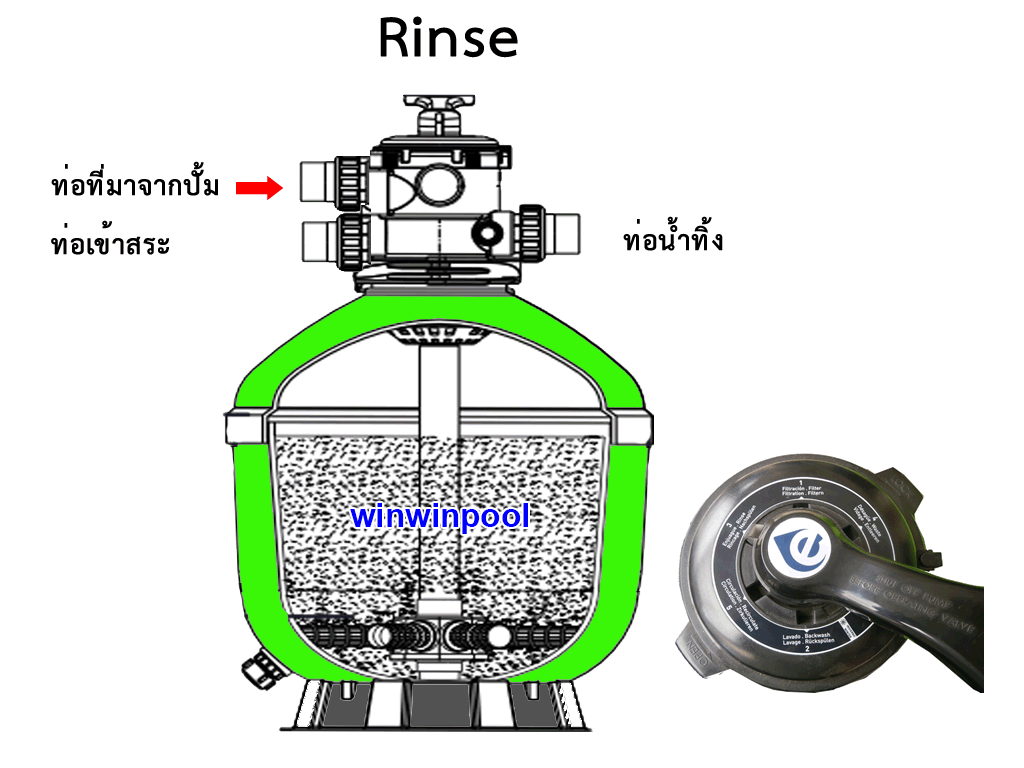
3. Rinse Mode
After completing the backwash process, the valve should always be set to Rinse.
This step helps settle and re-level the sand bed inside the filter tank. Water flows normally through the sand, but instead of returning to the pool, it is discharged through the waste line.
The rinse process usually takes about 30 seconds to 1 minute.
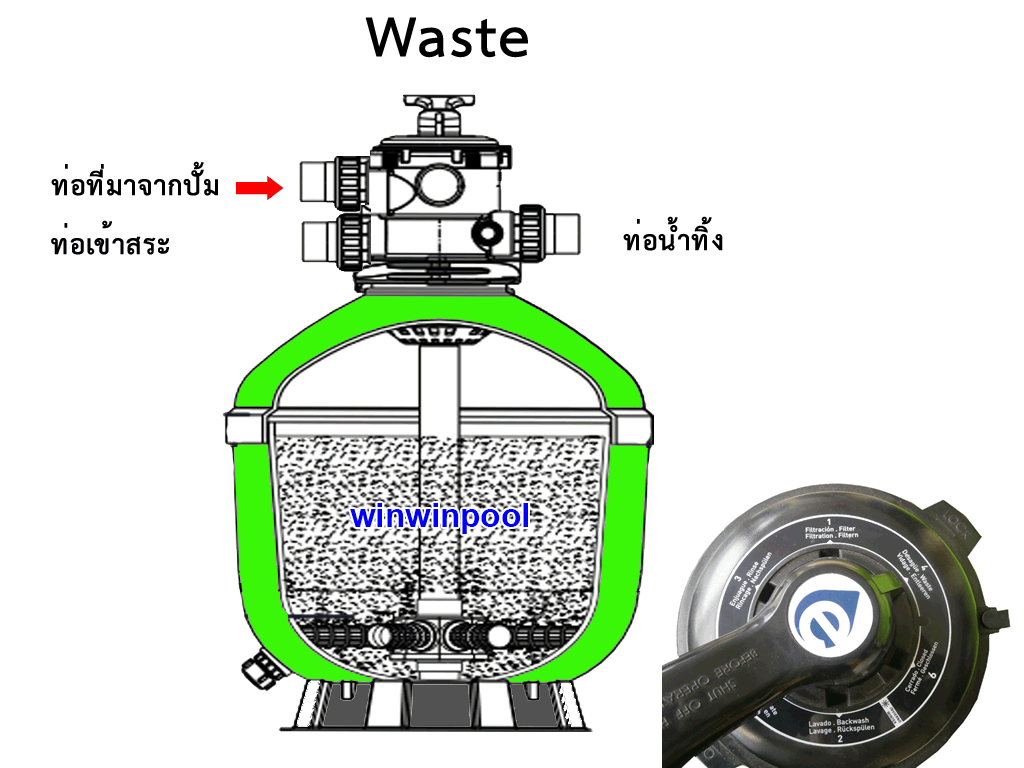
4. Waste Mode
This position allows water to be drained directly from the pool without passing through the sand filter.
It is commonly used when removing heavy debris or vacuuming extremely dirty water directly out of the pool.
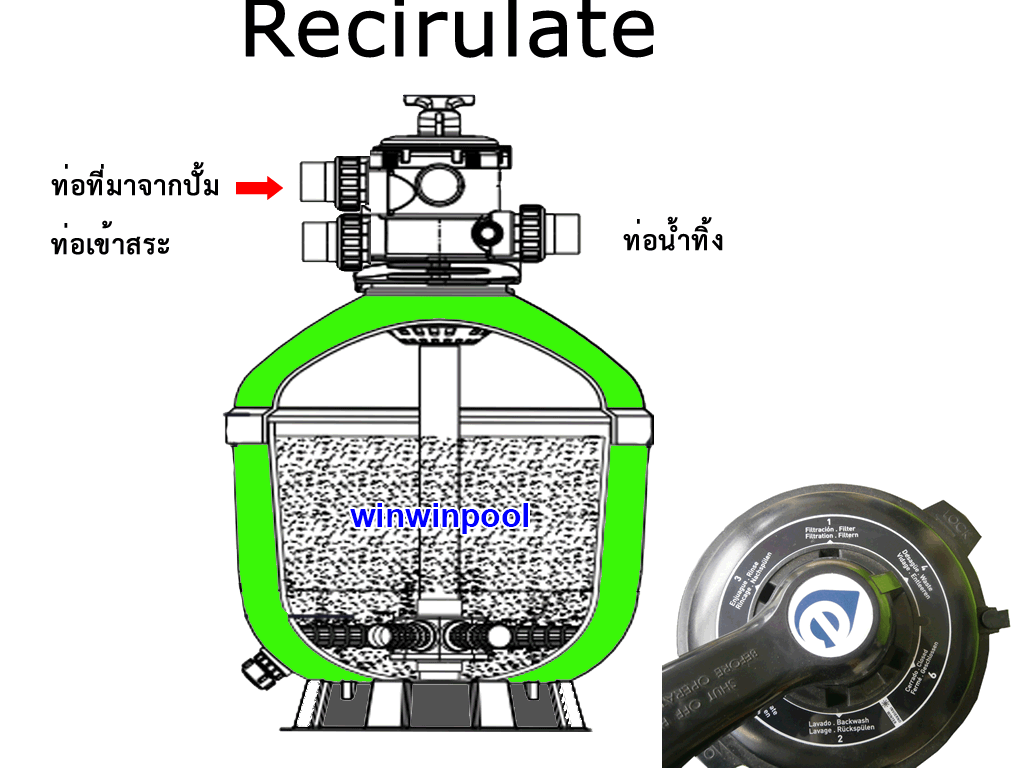
5. Recirculate Mode
In this position, water circulates through the pool system without passing through the sand filter.
This is useful when quickly mixing chemicals into the pool water or when filtration is temporarily not required.
6. Closed Mode
This position completely stops water flow into the filter system.
This position should only be used during maintenance or system repairs. It is not recommended for normal operation to avoid accidentally starting the pump while the valve is closed.


